HTML5 Canvas : Animation
Basic principles of animation
Animation refers to a work that is played continuously by many frames of still pictures at a certain speed (such as 16 pictures per second), and the naked eye mistakenly thinks the picture is active due to the illusion of visual residual image. In order to get the active picture, there will be subtle changes between each picture. The most common way to make pictures is to draw them on paper or celluloid.
Once the graphics based on HTML5 canvas are drawn, it is still there. If we need to move it, we have to redraw all the figures (including the previous ones). That is to say, to achieve animation effect is to draw an image on the canvas, empty the canvas, then draw the image, and then empty... That is, to repeat the operation before the animation is finished playing!
Basic steps of animation
We can draw a frame through the following steps:
- Empty canvas
- Unless the next thing you're going to draw is full of canvas (for example, a background image), you need to clear everything. The easiest way is to use the clearrect method.
- Save canvas status
- If you want to change some settings that will change the canvas state (style, deformation, etc.), and you want to be in the original state at each frame, you need to save it first.
- Draw animated shapes
- This step is to redraw the animation frame.
- Restore canvas status
- If you have saved the state of canvas, you can restore it first and then redraw the next frame.
Manipulating animation
In order to implement animation, we need some methods that can perform redrawing regularly. There are two ways to do this. First, you can use the 'setinterval' and 'setTimeout' methods to control redrawing at a set point in time.
Available timing execution methods:
//When the interval is set, the function will be executed regularly.
setInterval(function, delay)

//Execute the function after the set time
setTimeout(function, delay)

// tell the browser to execute the animation and request the browser to call the specified function to update the animation before the next repainting.
requestAnimationFrame(callback)
About 'requestanimationframe', this is an API specially designed for high-performance frame animation. Different browsers have different implementations, and we can also unify this method by extension.
if (!window.requestAnimationFrame) {
      window.requestAnimationFrame = (window.webkitRequestAnimationFrame ||
                                      window.mozRequestAnimationFrame ||
                                      window.msRequestAnimationFrame ||
                                      window.oRequestAnimationFrame ||
                                      function (callback) {
                                        return window.setTimeout(callback, 1000 / 60 );
                                      });
    }

 if (!window.cancelAnimationFrame) {
      window.cancelAnimationFrame = (window.cancelRequestAnimationFrame ||
                                     window.webkitCancelAnimationFrame || window.webkitCancelRequestAnimationFrame ||
                                     window.mozCancelAnimationFrame || window.mozCancelRequestAnimationFrame ||
                                     window.msCancelAnimationFrame || window.msCancelRequestAnimationFrame ||
                                     window.oCancelAnimationFrame || window.oCancelRequestAnimationFrame ||
                                     window.clearTimeout);
    }
Animation: moving a small ball
Through the understanding of the above knowledge, we can try to realize a small ball moving down.
1. Preparation
<html>
<body>
<canvas id="myCanvas" width="200" height="200" style="border: 1px solid">
Your browser does not support canvas, please upgrade your browser
</canvas>
</body>
</html>
<script>
//Prepare canvas
var canvas = document.getElementById("myCanvas");
var ctx = canvas.getContext("2d");
//To draw a small ball, the parameter vy refers to the offset on the y-axis. The larger the value of the y-axis is, the lower the position of the small ball is
function drawBall(vy) {
ctx.save();
ctx.beginPath();
ctx.fillStyle = "red";
ctx.arc(100, 55 + vy, 15, 0, Math.PI * 2);
ctx.fill();
ctx.restore();
}
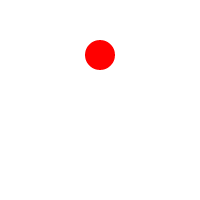
//Initialize, draw a static ball
drawBall(0)
</script>
2. Redraw the ball with timer
//Define offset
var i = 0;
//Define to move the ball down 100 pixels
var distance = 100;
//Turn on a timer
var timer = setInterval(function(){
//Increase the offset value every time you redraw
i++;
//Draw a small ball at each increment offset
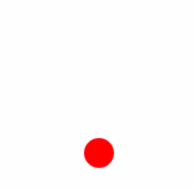
drawBall(i);
if(i > distance){
//If the ball has completed the task of moving 100 pixels, destroy the timer
clearInterval(timer);
}
})

It can be seen from the above figure that every offset of the small ball in the downward moving track is drawn. Obviously, such a picture is not what we want. We only need to display a small ball, so we only need to clear the previous drawing before each drawing of the small ball. The final code is as follows:
<html>
<body>
    <canvas id="myCanvas" width="200" height="200" style="border: 1px solid">
        Your browser does not support canvas, please upgrade your browser
    </canvas>
</body>
</html>
<script>
    //Prepare canvas
    var canvas = document.getElementById("myCanvas");
    var ctx = canvas.getContext("2d");

    //To draw a small ball, the parameter vy refers to the offset on the y-axis. The larger the value of the y-axis is, the lower the position of the small ball is
    function drawBall(vy) {
        ctx.save();
        ctx.beginPath();
        ctx.fillStyle = "red";
        ctx.arc(100, 55 + vy, 15, 0, Math.PI * 2);
        ctx.fill();
        ctx.restore();
    }

    //Initialize, draw a static ball
    drawBall(0)

    //Define offset
    var i = 0;
    //Define to move the ball down 100 pixels
    var distance = 100;
    //Turn on a timer
    var timer = setInterval(function(){
        //Increase the offset value every time you redraw
        i++;
        //Empty canvas
        ctx.clearRect(0,0,200,200);
        //Draw a small ball at each increment offset
        drawBall(i);
        if(i > distance){
            //If the ball has completed the task of moving 100 pixels, destroy the timer
            clearInterval(timer);
        }
    })
</script>
Animation: to achieve a bouncing ball
In the above example, we have been able to move the ball. If we want to achieve the rebound effect after falling to the ground, how to achieve it?
My thoughts:
- At the initial stage of preparation, we need to draw a line as the ground, a regular circle as the ball, and an ellipse as the extrusion effect of the ball when it contacts the ground.
- Move the ball to the ground and display the oval ball. After the whole extrusion process, the round ball will be displayed when it rebounds.
The attempt code is as follows:
<html>

<body>
    <canvas id="myCanvas" width="200" height="200" style="border: 1px solid">
        Your browser does not support canvas, please upgrade your browser
    </canvas>
</body>

</html>
<script>
    //Prepare canvas
    var canvas = document.getElementById("myCanvas");
    var ctx = canvas.getContext("2d");
    //Set the default fill color, which is the ball color
    ctx.fillStyle = "red";

    //The moving distance of the ball, y value of the ground - y value of the ball's starting position - radius of the ball
    var distance = 160 - 55 - 15
    //The amount of deformation caused by extrusion of a small elliptical ball
    var degree = 5

    //Draw the ground
    function drawGround() {
        ctx.save();
        ctx.beginPath();
        ctx.moveTo(0, 160);
        ctx.lineTo(200, 160);
        ctx.stroke();
        ctx.restore();
    }

    //Draw a little round ball
    function drawBall(vy) {
        ctx.save();
        ctx.beginPath();
        //Move down as offset increases
        ctx.arc(100, 55 + vy, 15, 0, Math.PI * 2);
        ctx.fill();
        ctx.restore();
    }

    //Draw an oval ball
    function drawBall2(v) {
        ctx.save();
        ctx.beginPath();
        //In the process of deformation, because the height of ellipse becomes smaller and smaller, the coordinate value of Y-axis of ellipse will be increased, showing the effect that the small ball is close to the ground
        ctx.ellipse(100, 145 + v, 15 + v, 15 - v, 0, 0, Math.PI * 2);
        ctx.fill();
        ctx.restore();
    }

    //Clear the screen and restore the scene
    function clear() {
        ctx.clearRect(0, 0, 200, 200)
        drawGround()
    }

    //Initialize scene
    drawGround();
    drawBall(0);
    //Offset control parameters
    var i = 0
    //Extrusion control parameters
    var i2 = 0
    //Rebound or not
    var isBack = false

    setInterval(function () {
        if (i > -1 && i <= distance) {
            //When the ball is moving in the air
            //If the current state is rebound, decrease the value of y-axis; if it is decline, increase the value of y-axis
            if (isBack) {
                i--;
            } else {
                i++;
            }
            //Draw a ball moving in the air
            clear();
            drawBall(i);
        } else if (i == -1 && isBack == true) {
            //When the rebound ball returns to the starting position, the state is set to descend and the offset control parameter is reset
            //Equivalent to restarting animation
            isBack = false
            i = 0
        }
        else {
            //When the ball has completed the movement of the specified distance, indicating that it has contacted the ground, the operation of the oval ball is started
            if (i2 > -1 && i2 <= degree) {
                //The ball is in the process of extrusion
                //Operate the extrusion degree control parameter to show the process of flattening the ball and then returning to its original state
                if (isBack) {
                    i2--;
                } else {
                    i2++;
                }
                //Drawing a small ball during squashing
                clear();
                drawBall2(i2);
            } else if (i2 == -1 && isBack == true) {
                //When the ball returns to its original state after extrusion, the offset control parameter will be set to achieve the upward effect of the ball in the rebound process
                //Because it's rebound, so I always decreases and the ball goes up
                i = distance
            }
            else {
                //When the small ball completes the extrusion process, i.e. the increasing of I2 is larger than the maximum extrusion amount degree, it will enter the rebound state
                isBack = true
                //Operate the extrusion degree control parameter to make the ball enter the rebound calculation process
                i2 = degree
            }
        }
    }, 20)

</script>
Of course, the animation can be upgraded to control the falling speed of the ball through the acceleration of gravity. Some more humanized effects can be achieved one by one through various mathematical algorithms, which requires continuous learning and research in the years to come.
- 本文链接: https://www.zdyla.com/en/post/html5-canvas-animation.html
- 版权声明: 本博客所有文章和照片除特别声明外,转载请联系作者获取授权,并请注明出处!